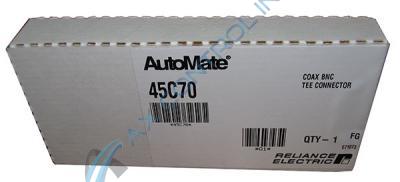
45C70

    Varying star amount pictures Varying star amount pictures Varying star amount pictures Varying star amount pictures Varying star amount pictures
  • 4.60 (5)
  • Click a star to rate this product
    Varying star amount pictures Varying star amount pictures Varying star amount pictures Varying star amount pictures Varying star amount pictures
  • 4.60 (5)
  • Click a star to rate this product
The 45C70 is a Coaxial BNC TEE Connector created to go with an AutoMax DCS Network Communications Module.

AVAILABILITY:

IN STOCK
SHIPS TODAY

Sell Surplus: Have a 45C70 to sell? Sell Now
Exchange Credit: Learn more about our exchange credit program
  • Part Number: 45C70
  • SKU: 45C70RE
  • Manufacturer: Reliance Electric
  • Series: AutoMax PLC

45C70 Technical Specifications

Manufacturer Reliance Electric
Series AutoMax PLC
Part Number 45C70
Product Type BNC Tee Adapter
Instruction Manual J-3606

Product Description

The 45C70 is a TEE Connector made by Reliance Electric. It may have also been sold by Baldor Reliance and Asea Brown Boveri.

The 45C70 is a Coaxial BNC TEE Connector created to go with an AutoMax DCS Network Communications Module. This part comes with two coax connectors in the package.  They are T-shaped. This connector works as a type of splitter that is mainly connected to coaxial cables leading to a remote I/O head. This type of connection is mandatory for that type of module. If you connect a Coax BNC 75 OHM Terminating Load (45C71) to a 45C70 you can then run another coax cable from the bottom side of the 45C70 to a Remote I/O Head. The remote I/O head can use coax cables to connect to a digital I/O rail, analog I/O rail, local head, and/or an LED or TWS.  You can then run another coax cable from the other side of the tee connector (not connected to the 45C71) to a Communications Passive Tap (57C380). The passive tap can then run a line to a remote communications module on an AutoMax DCS Master Rack or to another 57C380 that connects to a remote communication module on a Remote I/O rack.

The 45C70 can also be used to connect a PC link module to a DCS/AutoMax Network or Remote I/O Network. On the back of a PC link module, there is a port that the adapter can connect a network cable to. The network would then be considered complete and because of the tee connector, the user can then disconnect the module without messing up the network communication.

For more information about the 45C70 and how to properly install it, please refer to the data sheets and user manuals provided by Reliance Electric. Only skilled professionals should attempt handing the 45C70 and connecting it to the AutoMax DCS Network.

Frequently Asked Questions about 45C70

What does 45C70 connect to the Remote I/O network?
45C70 is used to attach the Remote I/O Head and the Remote Drive Interface Head to the Remote I/O network.
What does 45C70 attach to?
45C70 needs to be attached directly to the BNC jack connector on the front panel of the Remo I/O Head or Drive Interface Head.
Where can I see 45C70?
You can view a diagram of 45C70 in the AutoMax I/O Remote Communications Manual - Manual J-3606. The diagram of 45C70 is figure 3.5 in the manual. We're happy to send you this manual for 45C70.

Repair Services For 45C70

Type Lead Time Price Action
Repair Service 1-2 weeks $295

Our highly skilled technicians can repair your 45C70. All of our repairs come with a 3 Year AX Control Warranty. Please contact us for additional information about our repair process. To receive the repair pricing and lead time listed above please process your repair order via our website. The following repair options may be available upon request:

  • 48-72hr Rush Repair
  • Detailed Repair Reports
  • AX Control Certificate of Warranty

AX Control Warranty Info

All products we sell are backed by our unparalleled warranty. A warranty certificate will be provided with your order upon request.
All PLCs, HMIs, and Turbine Control Boards: 3 Years
All AC/DC and Servo Drives: 2 Years
All Motors: 1 Year
Learn More

45C70 Manuals, White Papers, Data Sheets, and Troubleshooting